Table of Contents
Installing drywall on a ceiling can be as tricky as walking a tightrope without a safety net. But fear not, for we have the top techniques to ensure a perfect installation every time.
With a keen eye for precision and a steady hand, you’ll learn how to measure and mark accurately, choose the right tools and materials, and secure those drywall sheets like a pro.
But that’s just the beginning. Stick around and discover how to conquer tricky corners and angles, create seamless joints, and achieve a smooth, flawless finish.
Don’t miss out on these invaluable tips and tricks that will leave you hanging for more.
Key Takeaways
- Accurate measurement and marking are crucial for a successful ceiling drywall installation. Use a reliable tape measure, take multiple measurements, and use marking tools and a level for precise markings.
- Properly prepare the ceiling by clearing the space, inspecting for issues, cleaning the surface, and creating a level surface by sanding down any uneven areas.
- Choose high-quality drywall from reputable brands and maintain your drywall tools in good condition. Invest in a drywall lift or hoist and have essential tools on hand for the installation process.
- Secure the drywall sheets properly using anchors, screws, and adhesive for stability and durability. Pay attention to spacing and use screw-in anchors or toggle bolts depending on the ceiling structure.
Measuring and Marking for Accurate Installation
To ensure precise and accurate installation, start by measuring and marking the ceiling for optimal drywall placement. Proper measuring techniques and marking tools are essential for achieving a seamless finish and creating a sense of belonging in your space.
When it comes to measuring, use a reliable tape measure to accurately determine the length and width of the ceiling area. Ensure that the tape measure is securely held in place, allowing for an accurate measurement. Take multiple measurements at different points to ensure consistency and accuracy.
Next, mark the measurements on the ceiling using marking tools such as a pencil or chalk line. These tools will help you create precise lines and reference points for the drywall installation. Use a level to ensure that the lines are straight and even across the ceiling.
In addition to measuring and marking the dimensions, it’s crucial to mark any electrical outlets, light fixtures, or other obstacles on the ceiling. This will ensure that the drywall is cut and installed neatly around these areas, creating a polished and professional look.
Remember to double-check your measurements and markings before proceeding with the drywall installation. Accuracy is key to achieving a flawless finish and creating a sense of belonging in your space.
Preparing the Ceiling for Drywall Hanging
Now that you have measured and marked the ceiling for accurate drywall placement, it’s time to prepare the ceiling for hanging the drywall. Proper ceiling preparation is essential to ensure a smooth and durable finish for your drywall. Follow these steps to get your ceiling ready for hanging:
- Clear the space: Before you start, make sure to remove any furniture or fixtures from the area. This will give you a clear and unobstructed workspace, allowing you to work efficiently and avoid any potential damage to your belongings.
- Inspect the ceiling: Take a close look at the ceiling to identify any existing issues or repairs that need to be addressed before hanging the drywall. Look out for cracks, water damage, or structural problems. It’s important to fix these issues beforehand to ensure a sturdy and long-lasting installation.
- Prepare the surface: To create a smooth base for the drywall, you need to clean the ceiling surface thoroughly. Remove any dust, dirt, or loose particles using a broom or vacuum cleaner. If there are any grease or stains, wipe them off with a damp cloth. Additionally, if there are any uneven areas, you may need to sand them down to create a level surface.
Choosing the Right Drywall and Tools
When selecting the appropriate drywall and tools, consider the specific needs and requirements of your project. Choosing the right drywall brand is crucial to ensure the longevity and durability of your ceiling. Look for reputable brands that offer high-quality drywall. These brands have been trusted by professionals and homeowners alike for their superior products.
Proper maintenance of drywall tools is also essential for a successful ceiling drywall installation. Keep your tools clean and free from any debris or build-up that could affect their performance. Regularly inspect them for any signs of wear and tear, and replace or repair them as necessary. This won’t only ensure that your tools function properly but also help you achieve a smooth and flawless finish on your ceiling.
Investing in the right tools is equally important. Make sure you have a reliable drywall lift or hoist, as this will greatly ease the installation process and prevent any unnecessary strain on your body. A good quality cordless drill with a screwdriver attachment, a utility knife, a T-square, and a drywall saw are also essential tools to have on hand.
Remember to wear appropriate safety gear, such as safety glasses and gloves, to protect yourself during the installation process. Additionally, consider using a dust mask to prevent the inhalation of drywall dust.
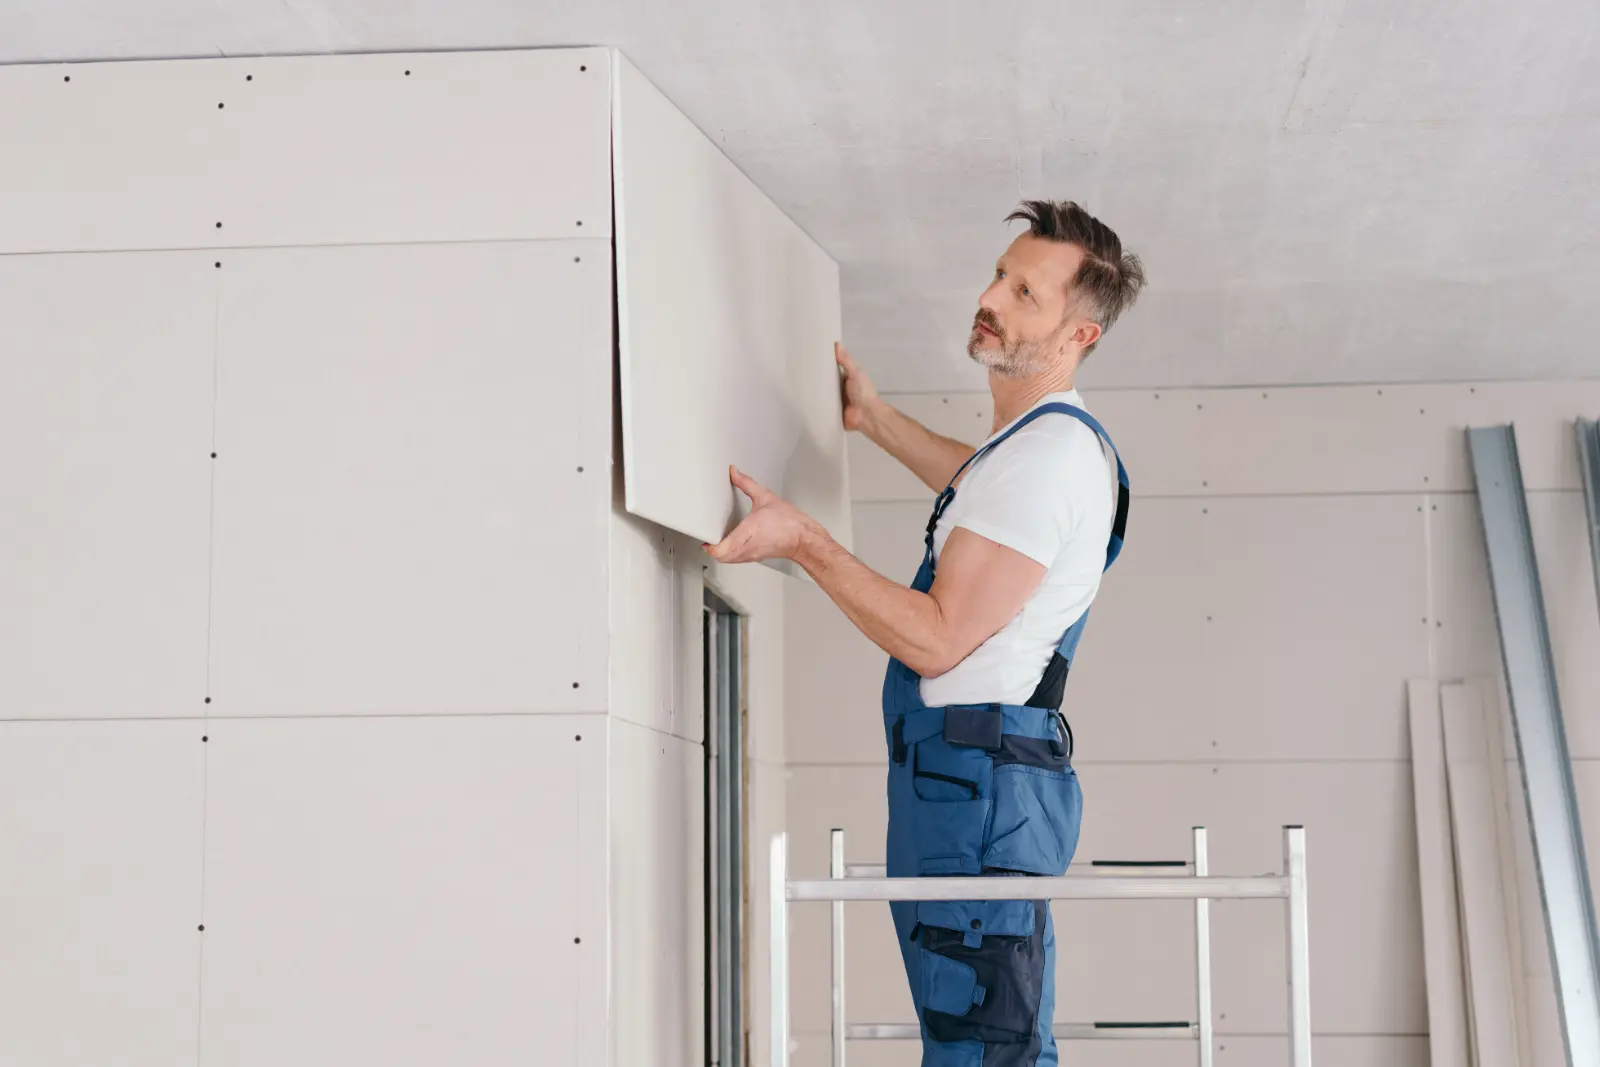
Properly Securing Drywall Sheets to the Ceiling
To properly secure drywall sheets to the ceiling, there are a few key points to keep in mind.
First, make sure to use secure anchors to provide stability and prevent the sheets from sagging or falling.
Additionally, using adhesive along with screws can provide extra strength and durability.
Lastly, be sure to properly space the screws to ensure an even and secure attachment.
Secure Anchors for Stability
For a secure and stable installation, ensure that the drywall sheets are properly secured to the ceiling using strong anchors. Here are three anchoring techniques that will help you achieve a perfect installation:
- Screw-in Anchors: These are easy to install and provide excellent stability. Simply screw them into the ceiling joists before attaching the drywall sheets.
- Toggle Bolts: Perfect for ceilings with no joists, toggle bolts provide a stronghold. Drill holes in the drywall and insert the toggle bolts, which expand behind the surface for added support.
- Plastic Anchors: Ideal for lightweight drywall sheets, plastic anchors are simple to use. Drill holes, insert the anchors, and then secure the drywall with screws.
Use Adhesive for Strength
To ensure maximum strength and stability when securing drywall sheets to the ceiling, consider using adhesive in addition to anchors. An adhesive application provides an extra layer of support, preventing the sheets from sagging or falling over time. There are various adhesive alternatives available, each offering its own benefits and advantages. Here is a table showcasing some commonly used adhesive options:
| Adhesive Type | Advantages | Disadvantages |
|---|---|---|
| Liquid Nails | Strong bonding | Longer drying time |
| Construction Adhesive | Quick drying | Strong odor |
| Panel Adhesive | Easy application | Limited availability |
Properly Space Screws
Consider spacing screws properly to ensure secure and stable attachment of drywall sheets to the ceiling. Proper screw spacing is crucial for preventing issues like screw pops, which can lead to cracks and damage to the ceiling. Here are some screw spacing tips to help you achieve a professional finish:
- Start with the right spacing: Aim for a maximum spacing of 12 inches between screws along the edges of the drywall sheets and 16 inches in the field.
- Use a stud finder: Locate the ceiling joists and mark their positions before starting. This will help you determine where to place your screws for maximum stability.
- Follow the manufacturer’s recommendations: Different types of drywall may have specific screw spacing guidelines provided by the manufacturer. Always refer to these instructions to achieve the best results.
Dealing With Tricky Corners and Angles
When dealing with tricky corners and angles during ceiling drywall installation, it can be helpful to approach the task with patience and precision. These areas require extra attention to ensure a seamless and professional finish. Whether you’re dealing with sloped ceilings or addressing uneven surfaces, there are techniques that can help you achieve the best results.
One method for dealing with sloped ceilings is to use a flexible drywall corner bead. This type of corner bead is designed to bend and conform to the angle of the ceiling, making it easier to achieve a smooth transition. Simply measure the angle of the slope and cut the corner bead to fit. Secure it in place with drywall screws or nails, and then apply joint compound to create a seamless finish.
Addressing uneven surfaces can be a bit more challenging, but it’s not impossible. One technique is to use shims to level out the surface before installing the drywall. Place the shims behind the drywall at the uneven areas, making sure to secure them firmly. This will help create a level surface for the drywall to adhere to. Once the drywall is installed, use joint compound and sanding to create a smooth finish.
Here is a table that summarizes these techniques:
| Technique | Description |
|---|---|
| Flexible drywall corner bead | Use this type of corner bead for sloped ceilings to achieve a smooth transition |
| Shims | Place shims behind the drywall at uneven areas to level out the surface before installation |
| Drywall screws or nails | Secure the corner bead in place with these fasteners |
| Joint compound | Apply this compound to create a seamless finish |
Taping and Mudding for Seamless Joints
For achieving seamless joints, the key step is taping and mudding the drywall. This crucial process ensures that the seams between the drywall sheets are invisible, resulting in a flawless finish. To help you achieve the best results, here are some tips and techniques for taping and mudding your ceiling:
- Prepare the surface: Before you begin taping and mudding, make sure to clean the drywall surface thoroughly. Remove any dust, dirt, or debris using appropriate cleaning tools such as a vacuum cleaner or a dry cloth. A clean surface will ensure better adhesion and a smoother finish.
- Apply the tape: Start by applying drywall tape over the seams. You can use either paper tape or self-adhesive mesh tape. Paper tape is more durable and provides a stronger bond, while mesh tape is easier to work with, especially for beginners. Apply the tape firmly, but avoid stretching it too much, as it can cause cracks later on.
- Mud and feather the joints: Next, apply a thin layer of joint compound, also known as mud, over the taped seams using a taping knife. Make sure to feather the edges of the mud to create a smooth transition between the joint and the surrounding drywall. For larger seams, you may need to apply multiple coats, allowing each layer to dry before applying the next.
While taping and mudding are the traditional methods for achieving seamless joints, there are alternative methods available, such as using drywall adhesive or textured compounds. These methods may require different tools and techniques, so it’s essential to research and choose the one that best suits your needs and skill level.
Sanding and Smoothing the Drywall Surface
Now, it’s time to focus on sanding and smoothing the drywall surface to achieve a flawless finish.
You’ll learn various sanding techniques that will help you achieve smoothness, and you’ll discover the tools that will make your sanding process more efficient.
With these techniques and tools at your disposal, you’ll be able to achieve a professional-looking result for your ceiling drywall installation.
Sanding Techniques for Smoothness
To achieve a smooth and flawless drywall surface, utilize effective sanding techniques. Proper sanding is crucial for achieving a professional finish and creating a visually appealing ceiling. Follow these tips to ensure a smooth surface preparation:
- Start with coarse-grit sandpaper: Begin by using coarse-grit sandpaper to remove any high spots or imperfections on the drywall surface. This will help create a level base for further sanding.
- Progress to finer-grit sandpaper: Gradually switch to finer-grit sandpaper as you work your way towards achieving a smooth finish. This will help remove any remaining roughness and provide a polished look.
- Use a sanding block: To ensure even sanding and prevent uneven surfaces, use a sanding block instead of just your hand. This will help maintain consistent pressure and avoid creating waves or indentations.
Tools for Efficient Sanding
Efficiently sanding and smoothing the drywall surface requires the use of appropriate tools. Choosing the right sanding tools can make your job easier and help you achieve a professional finish. Here are some essential tools that will aid you in achieving efficient sanding techniques:
| Sanding Tool | Description |
|---|---|
| Sanding pole | Allows you to reach high ceilings and walls easily |
| Hand sander | Provides better control and precision in small areas |
| Sanding sponge | Ideal for curved or uneven surfaces |
By using a sanding pole, you can comfortably sand larger areas without straining yourself. A hand sander is perfect for corners and tight spaces, giving you more control over the sanding process. Sanding sponges are great for achieving smoothness on curved or uneven surfaces.
Choosing the right tools for sanding will not only save you time and effort but also ensure a flawless finish. So, invest in these tools and master the art of efficient sanding techniques.
Finishing Touches for a Professional Look
For a professional look, consider incorporating these finishing touches into your ceiling drywall installation.
- Smooth Drywall Texture Techniques: Achieving a smooth and flawless texture on your ceiling can greatly enhance its overall appearance. One technique is to use a drywall knife to apply joint compound in thin layers, feathering the edges as you go. Another technique is to use a drywall sander to smooth out any imperfections or unevenness. Lastly, consider using a sanding sponge to gently sand the surface for a polished finish.
- Proper Painting Tips: Once your drywall is properly textured, it’s time to give it a fresh coat of paint. To ensure a professional finish, start by applying a high-quality primer to seal the drywall and create a smooth surface for the paint. Use a roller brush with a long nap to distribute the paint evenly, applying it in thin layers. Allow each layer to dry completely before applying the next one. Lastly, be sure to use a high-quality paint that’s specifically formulated for ceilings, as it will provide better coverage and a more durable finish.
- Attention to Detail: To truly achieve a professional look, pay attention to the small details. Take the time to properly prep the area before starting your drywall installation, including cleaning the surface and removing any debris or dust. Use masking tape to protect adjacent surfaces, such as walls or trim, from accidental paint splatters. Additionally, ensure that all seams and joints are properly taped and mudded for a seamless finish. Finally, take the time to clean up any mess or debris after completing the installation, leaving your space looking clean and tidy.
Summary
So there you have it, folks! After following these top techniques for perfect ceiling drywall installation, you’ll be a true pro in no time.
Say goodbye to lumpy, uneven ceilings, and hello to a seamless and professional finish.
Now go forth and conquer those ceilings, and remember, practice makes perfect. Happy drywalling!